RGB LED Screen and Matrices
This tutorial is about RGB LED Screen and Matrices, understanding matrices allow us to create more complicated patterns.
Wiring
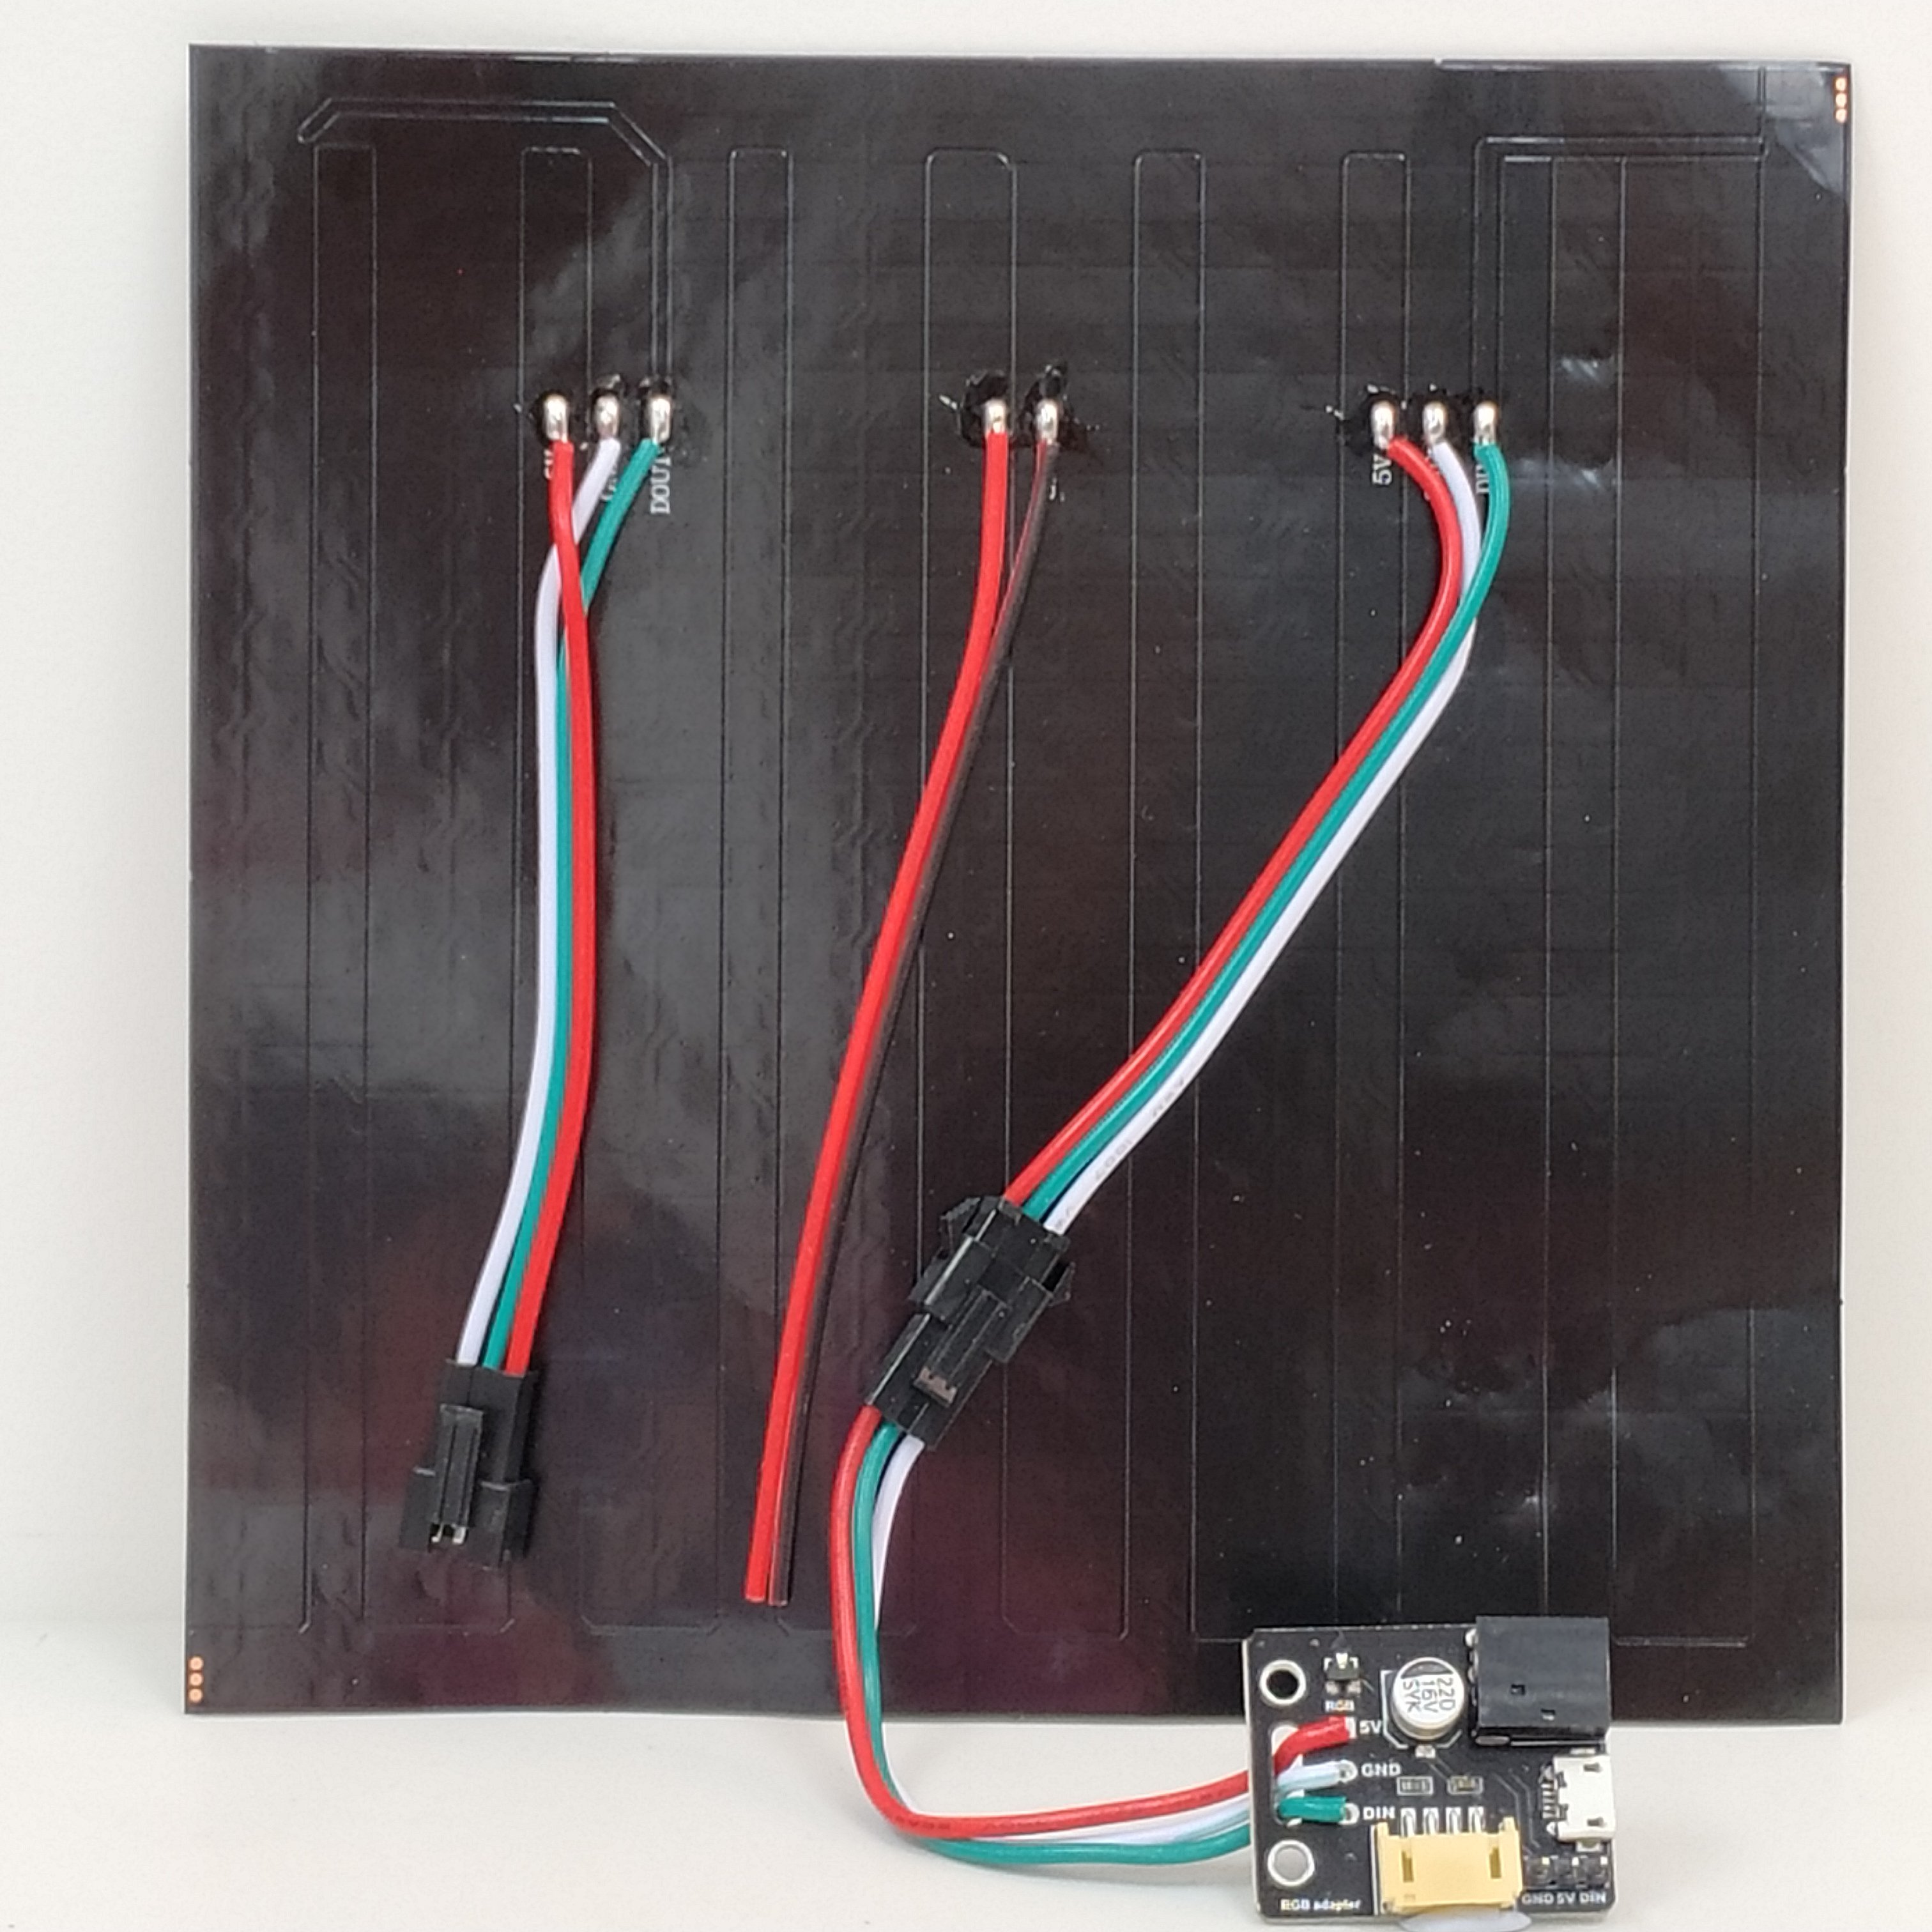
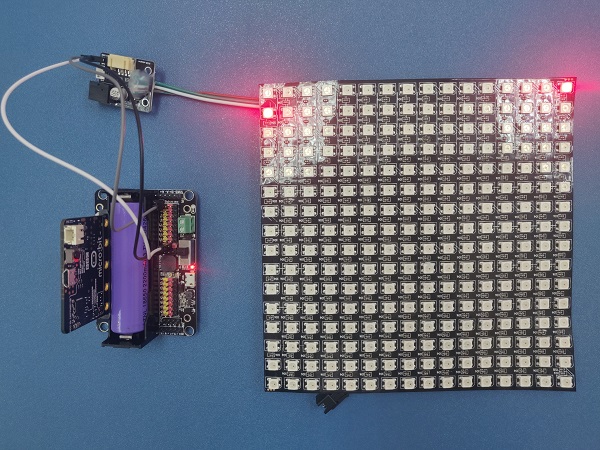
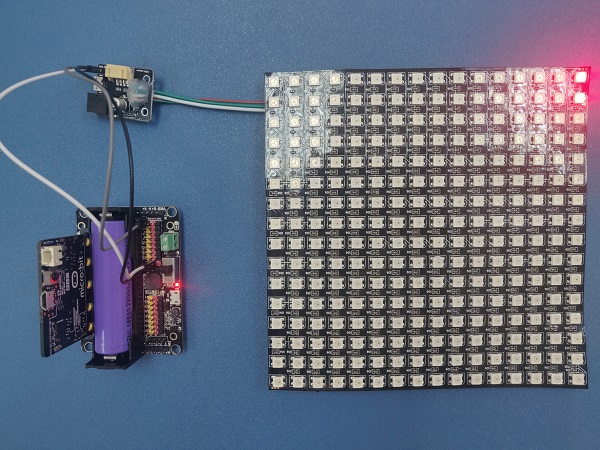
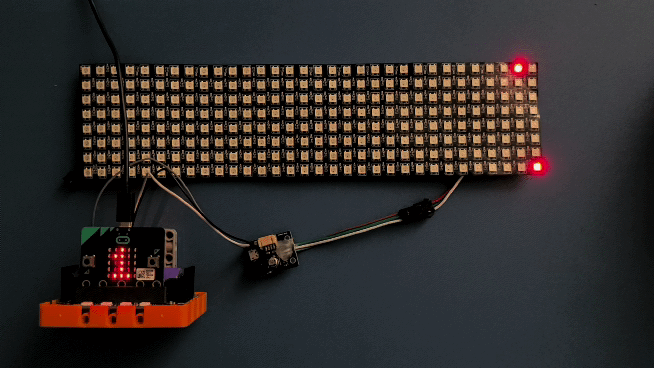
RGB LED Screen is used with the Robotbit, please refer to the following figures.
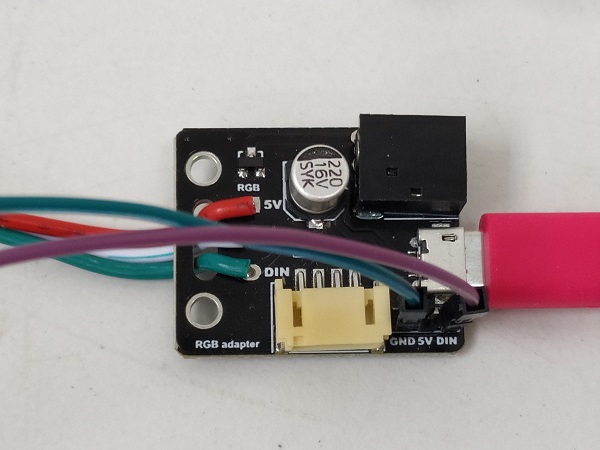
1. Connect the screen to the adapter.
2. Connect the adapter to Robotbit。
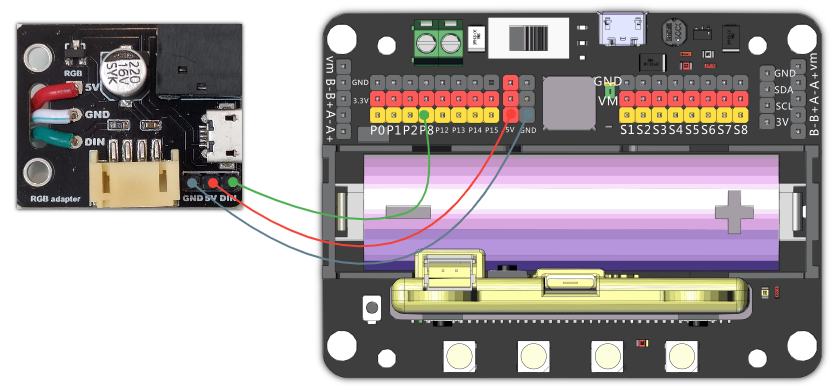
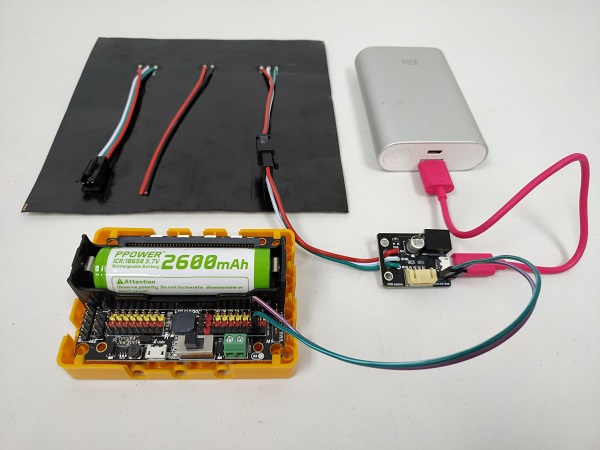
3. For prolonged use, connect a USB power.
As power is delivered via USB, you don’t have to use the 5V pin on the adapter.
4. Demonstration of wiring
RGB LED Screen and Matrices
A matrix can be understood as a table with X and Y axes. So a table with 10 columns and 10 rows can be understood as a 10x10 matrix.
For example, a resolution of 1920x1080 is a matrix of 1920x108.
In other words, the 8x32 or 16x16 screens are also matrices.
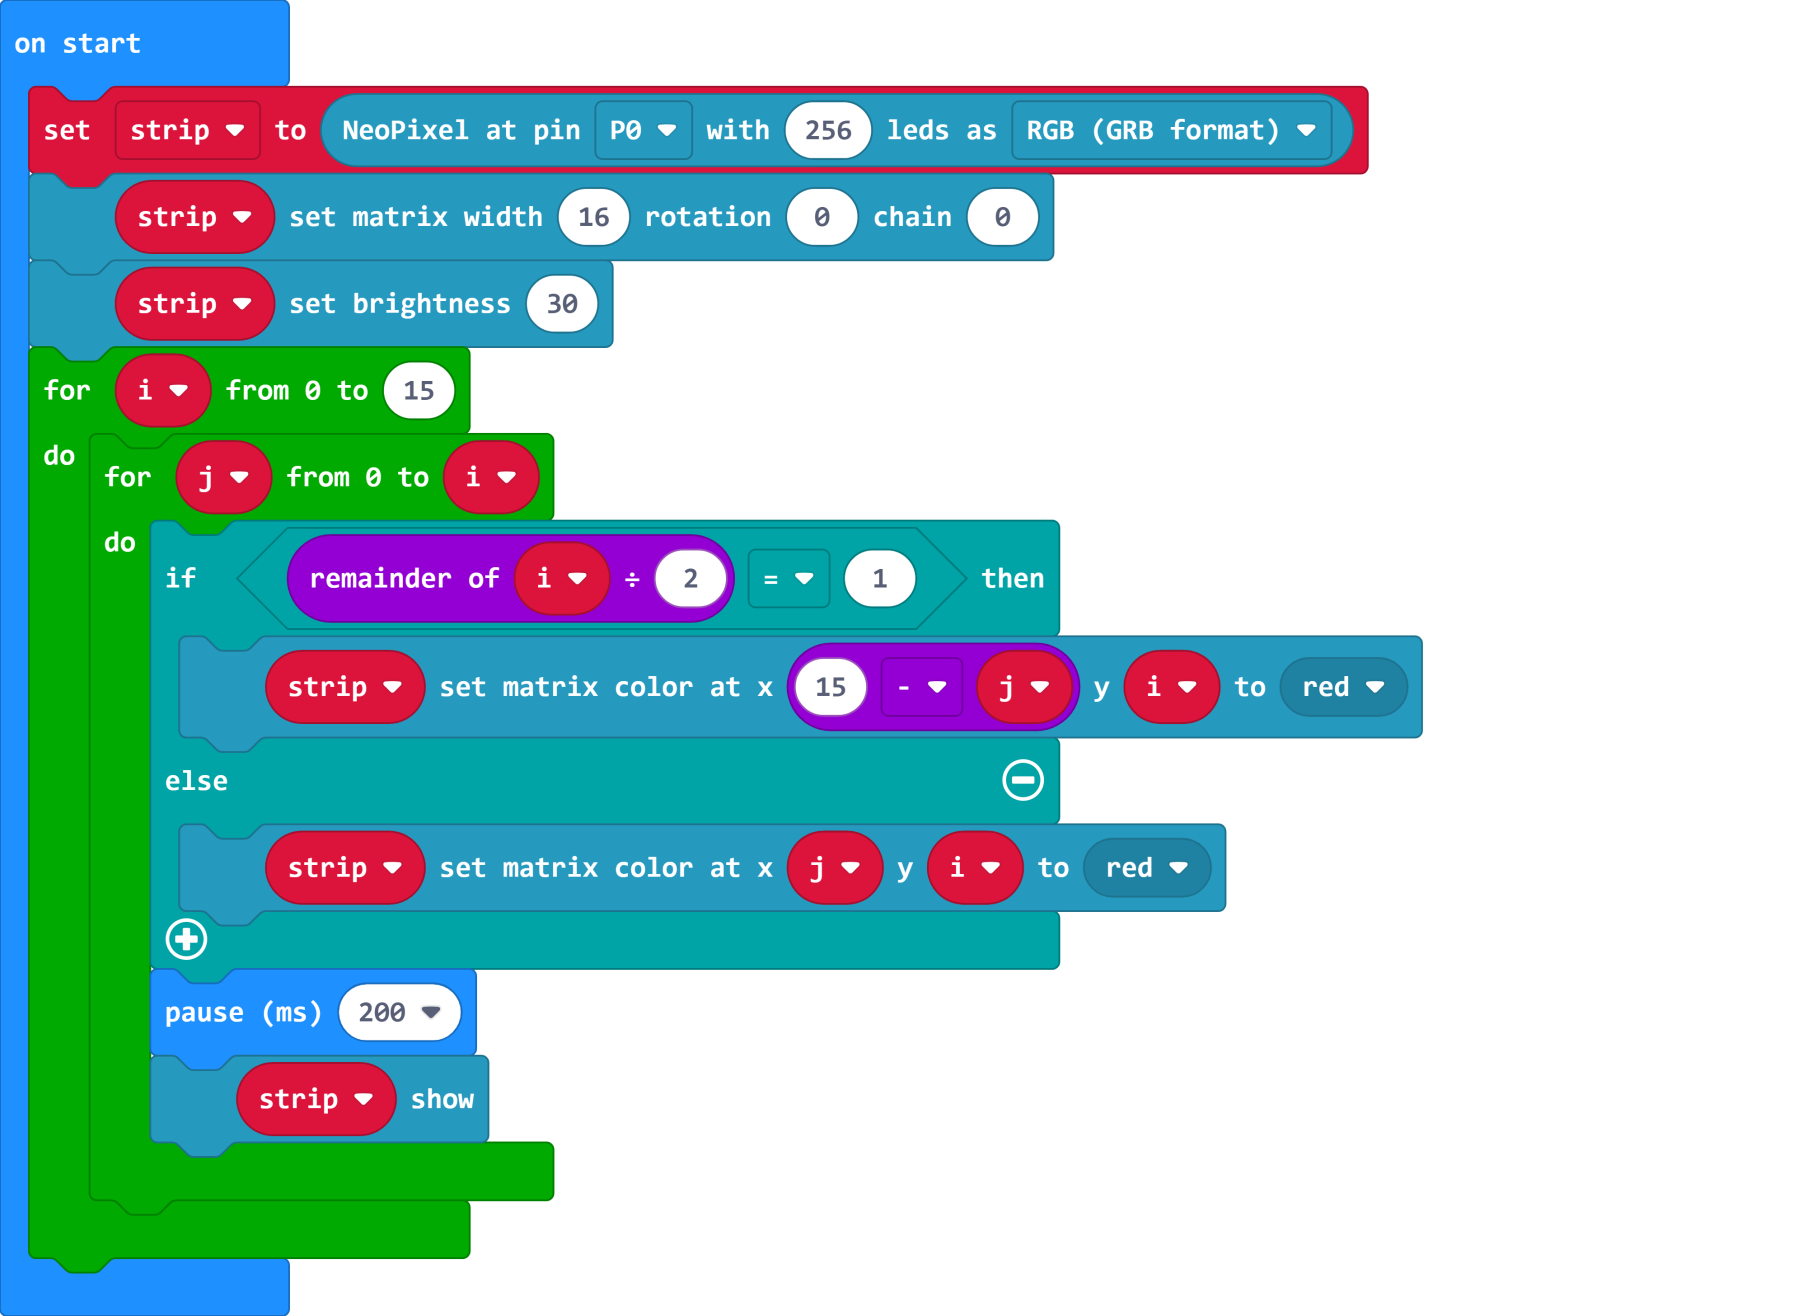
Makecode Coding tutorial

Load the NeoPixel extension.
We can initialize the screen as a 16x16 matrix. Pixels can be selected by using coordinates.

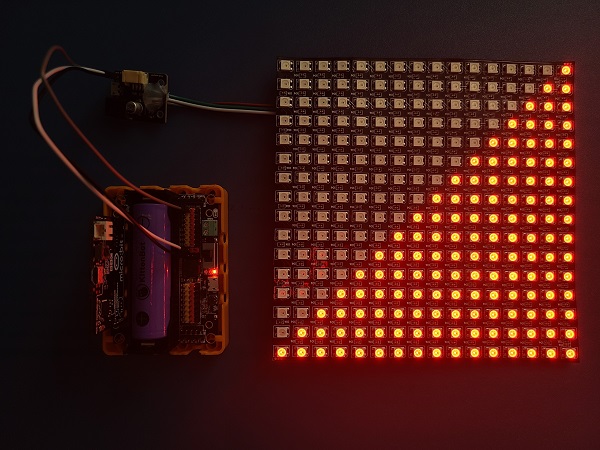
Lighting up the first pixel in the first 2 rows.
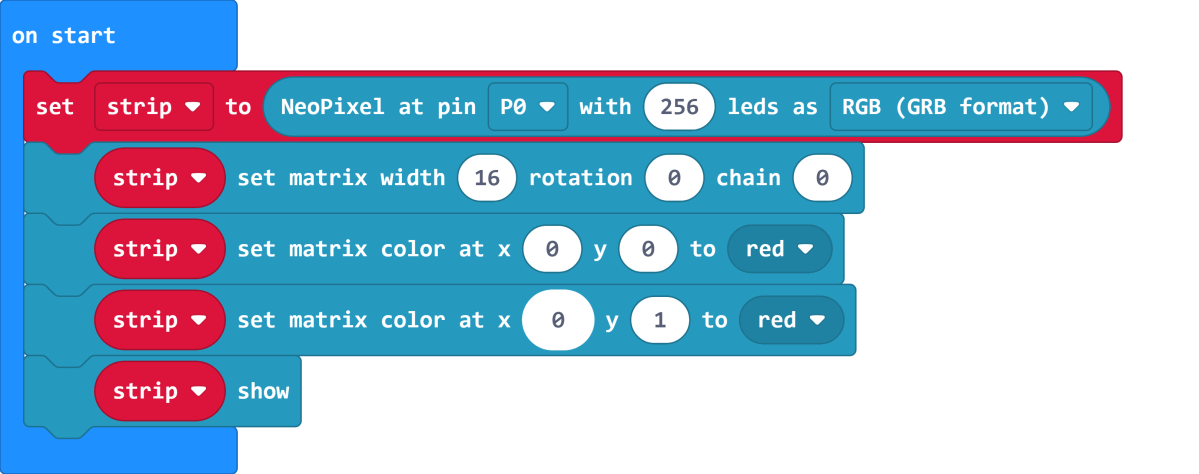
We can see that the pixel that lights up is different in the 2 rows despite having the same X value.
This is because the screen is wired in a zig zag pattern, so the direction of X changes on each row(Refer to the following figure).

In our code, the direction of X is from right to left on the first row(Y=0).
But on the second row(Y=1), the direction of X is left to right.
Therefore, when Y is and odd number, we have to reverse the position of X.
Computers count from 0.
Reversing is simple, we just have to minus X from the width of the matrix.
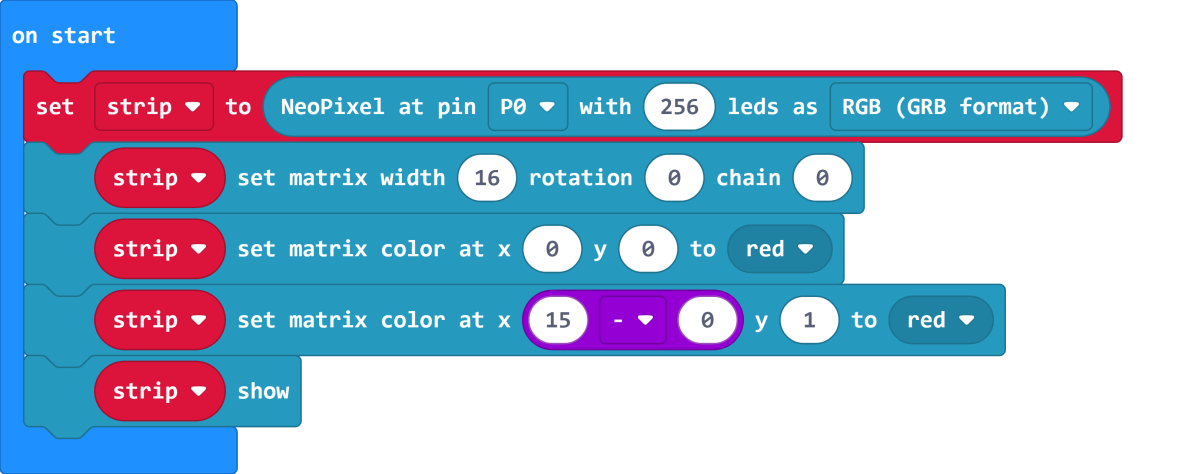
Although the matrix width is 16, but computers count from 0. So we have to minus 1.(16-1=15))
The RGB module from Powerbrick does not need this modification.
As a result, we need to modify X when displaying patterns.
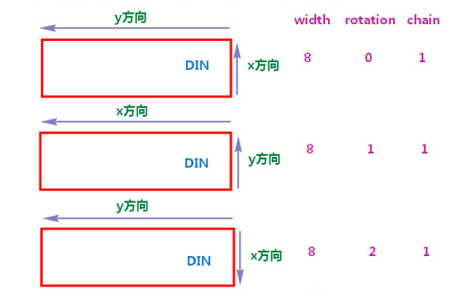
Matrix Rotation
The following code shows the effect on the X and Y axis when rotating the matrix.
Rotating the matrix may sometimes be helpful.

There are 3 kinds of rotation.
Refer to this figure for the relation between the axes and rotation.
Extension Version and Updates
There may be updates to extensions periodically, please refer to the following link to update/downgrade your extension.
FAQ
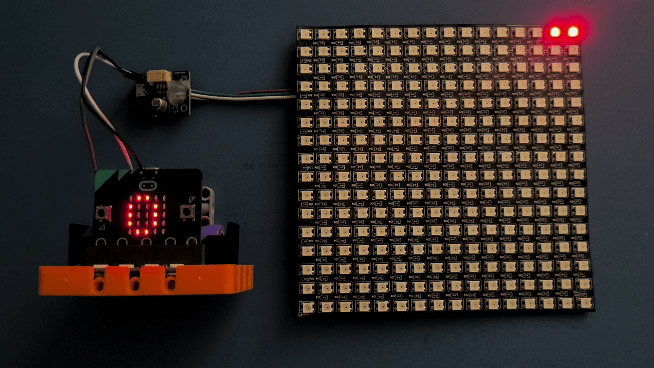
Q: Why is red the only colour lit up when I try to use different colours?
A: There is not enough power.
Solution: Reduce brightness or turn on the power on the Robotbit, or connect to a USB power.
Precautions
Do not connect a power supply with a voltage higher than 5V.
Connect to a USB power supply when for prolonged use.
Lower the brighness when a lot of LEDs are lit.
This product is suitable for users aged over 14, children aged 8-14 need to be under the supervision of an adult when using this product.
Please refer to Kittenbot’s official guidelines before using, wiring must follow the guidelines, do not use a high power servo or motor when using this product.
To avoid short circuiting, do not put this product on conductive surfaces such as metal.
To avoid short circuiting, do not put this product in water.
Do not touch the exposed wires with bare hands.